
Staff presentations for today’s public
Introduction
A key principle of successful asynchronous public hearings on the People Speak platform is staff and optionally applicant presentations – pre-recorded and published online. This allows the public to learn and provide input on the issues that matter most to them. It promotes inclusivity and is the best way to reach residents who are representative of your community.
3 Steps
While preparing your first online presentation may seem daunting, there are just three simple steps:
Prepare your slides and script
Record your presentation
Export and upload your presentation to YouTube
Once staff and applicant presentations are uploaded to the city YouTube channel, you can then embed those videos into the People Speak platform and publish them to your online public hearing pages.
“Making the slides is no different than before the recording and we have pretty standard templates for different case types so we’re never reinventing the wheel. I expect staff to practice their presentations so it doesn’t really add any time. Furthermore, getting it done and recorded in advance has helped with quality control. It wasn’t uncommon before Wheat Ridge Speaks for presentations to get finalized hours before a hearing.” - Lauren Mikulak, AICP, Planning Manager, City of Wheat Ridge, CO
Presentation Software
While there’s a variety of software to choose from for creating presentations, from Keynote, to Prezi, to Google Slides, most cities use PowerPoint and find it efficient:
“We use PowerPoint to make narrated presentations. We trained planners to do this awhile back with their standard presentations they give at planning commission. They record it and then save it as an mp4 which the planning tech will upload to the City’s YouTube account. It’s not that much extra work since they would be writing the script/notes to present at the in-person meeting(s) anyway.” - Bella Vaz, Communication Specialist, City of Grand Junction.
We recommend PowerPoint because it has a unique feature that allows you to record narration on a per slide basis. This means if you want to re-record a specific part of your presentation, for example if you bungle a single slide or get feedback after you’ve already recorded the presentation, it’s easy to re-record without having to redo the entire presentation.
Audio
Some cities have experimented with using external microphones to record audio for their presentations, for example a Blue Yeti mic (for about $100). However, most folks find using the same laptop or headphone microphones they use for video conferences are optimal. The basic rule of thumb is: if it works for Zoom it works for recording.
“The staff at Lakewood use a variety of audio equipment, some external mics, others just use the built-in microphone in their computer. Combining a very basic audio setup with using Microsoft Powerpoint makes it simple: you can record audio over each slide individually and don’t have to do any additional editing or work at all!” - Travis Parker, Planning Director, City of Lakewood, CO
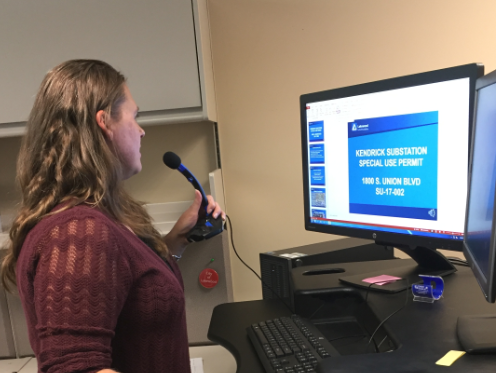
Simple mic and computer setup used by staff in Lakewood.
How To Record A Presentation Using PowerPoint
Create and script the PowerPoint presentation as you normally would, and then record your presentation to post following these steps:
After completing your PowerPoint slides, record narration for each individual slide. Do a “save as…” of your final presentation and change the file name to indicate it had audio recording. (You will use the non-audio version for the in-person presentation).
Select “Slideshow” from the Ribbon. Select all checkboxes in the ribbon (for narration, timing, and media control).
Choose Record Slide Show. You have the option to record from the beginning or from the current slide meaning you do not need to record your presentation in one sitting.
If recording a single slide, or rerecording 1 or more slides, choose “record from current slide,” record that slide(s), then hit escape.
You can clear the timing and narration from a single slide and re-record also by choosing the down arrow on “record slide show.”
Leave both options checked (recording slide and animation timing and narration/pointer). Use the “laser pointer” option from the bottom left if you’re trying to point out something on the slide. It will not record the mouse movements.
After recording, watch the entire presentation by checking the “use timings” box and starting the slide show either from the beginning or from the current slide.
Preview the narration on each slide and fast forward by hovering over the speaker icon that now appears on each slide.
Save the file then export the final presentation to a video by choosing File 🡪 Export 🡪 Create a Video. Select Internet Quality and Use Recorded Timings and Narration. Save the .mp4 file to the case folder. (Exporting will take several minutes.)

Slide Show mode in Microsoft PowerPoint
Microsoft Office Tutorials
Review tutorials below if you need to learn more about this process including re-recording slides, playing back the audio for individual slides, and exporting the video.
Microsoft Office Tutorial: Record a slide show with narration and slide timings
Microsoft Office Tutorial: Turn your presentation into a video
The detailed instructions are courtesy of the City of Wheat Ridge, CO. For in-depth staff training materials please contact us.